BACKGROUND
This is my first attempt at railway modelling since I was 15, now I am 65 (2012) and retired and have the time, I can at last have a go at building a layout. The Westerham Valley Railway was the ideal line for me to model and Westerham Station in particular.
I remembered the branch line from my youth when i used to cycle past the station. It is built in my garage and is 10ft x 2ft here are a few pics of whats happening so far.
The time had come. Retirement day. This was it, the big one, but what was I going to do to keep myself busy? Reading perhaps, watch day time television (tried that for a morning, soon gave that up), a bit of gardening, time to relax and take things easy I thought. I had been thinking about building a model railway for 50+ years, and had even been given an 00 gauge Hornby Jinty and 3 coal wagons by my son for my 60th birthday with the comment “now you will have to build a model railway. You’ve been going on about it long enough, and why do you keep all those old model railway magazines from 1958 if you’re not going to build it?” He had touched a nerve there.
I had a collection of model railway magazines that I had kept from when I was twelve years old, when I had been given a Triang Princess Elizabeth train set for Christmas. That had been my only schoolboy attempt at a model railway, cardboard boxes for tunnels, Dinkey toys for the cars, toy soldiers for the passengers, all perfectly to scale in my view. The years passed by, no railway modelling but I still was interested in all things railway and steam.
Inspiration for the layout
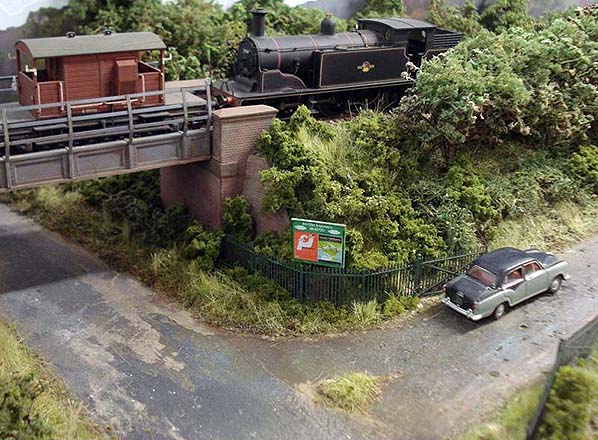
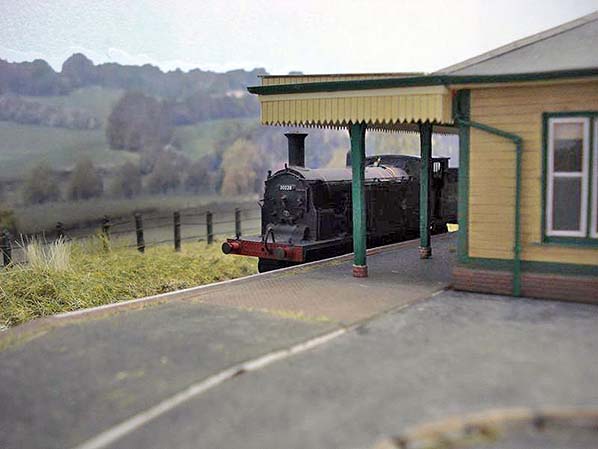
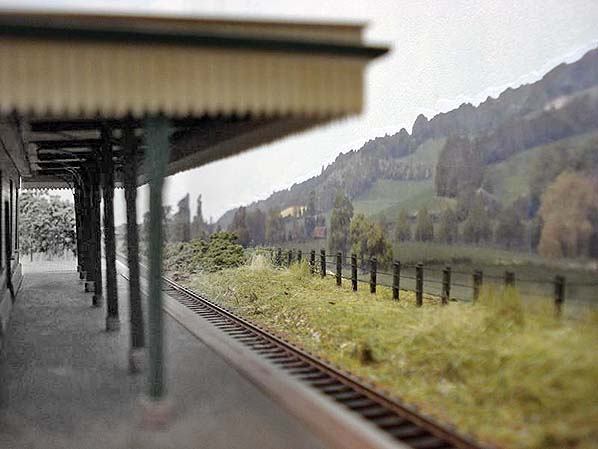
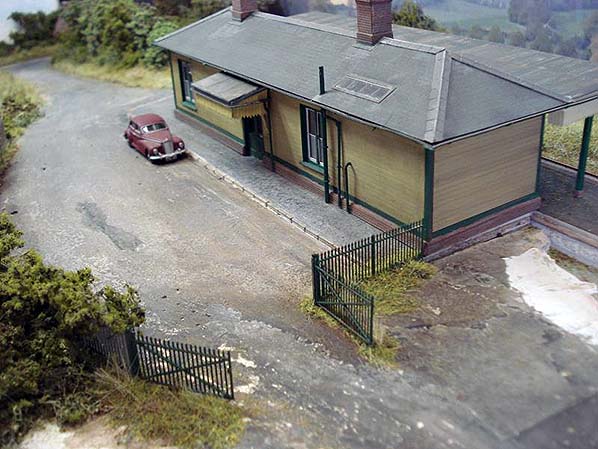
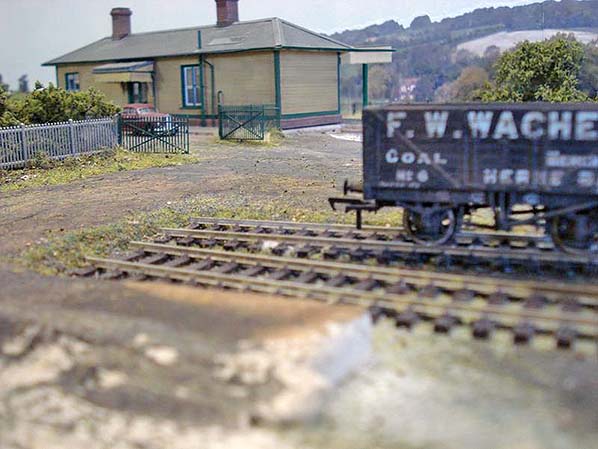
I used to cycle a lot, and one of my rides used to take me through Dunton Green to Westerham in Kent. This followed the route of the Westerham Valley Railway. The line had a small halt at Chevening, and a typical S.E.R country station and goods yard at Brasted, then finally the terminus at Westerham which looked like a perfect model railway with only a tiny signal cabin made from weatherboarding and a slate roof, a water tank perched on six spindly legs, a relatively large country goods yard with a medium sized goods shed constructed from clapboard, and a yard crane outside, the remains of the old engine shed which had been damaged in a gale many years previous and which had been demolished (just leaving the brick base with some railings which served no apparent purpose.) The water crane had also been damaged at some point, and was supported by a piece of bull head rail. The station building itself was a rather lopsided affair, the canopy didn’t quite extend the full length of the building as the station itself had been extended at some time. It was constructed from the usual S.E.R. weatherboarding resting on a brick base as were the other buildings, and it badly needed repainting.
Westerham town was close by and the RF Greenline coach to London stopped right outside the station. Opposite the station stood the Crown Hotel, and a small country school with a Kentish rag stone wall outside.
The line itself was only 4¾ miles long with no steep gradients or tight curves. Westerham is approximately 20 miles from London, and is situated on the south side of the North Downs. Sir Winston Churchill's home at Chartwell is nearby. The stone for his garden, and maggots for fish in his lake were delivered by rail to the station for collection.
The railway was opened on the 6of July 1881 at a cost of £70,000. The line closed on the 28 October 1961. An attempt at preservation was made but unfortunately failed after 2years. The only things remaining from those days are the base of the goods yard crane and the coal office. The rest is beneath the M25 motorway or modern factory units. Such is progress!
“But where is this reminiscing leading us all?” I hear you mumble. Well, how about making a model of Westerham station in my garage? That should keep me busy, and researching it would provide yet another interest when it was too cold to work outside in the garden.
Digging out my 1958 railway modelling magazine and chasing some cobwebs away, I started to gen up on some of the things about railway modelling that I had forgotten. Most of the articles seemed to be written by retired vicars and admirals with plenty of time on their hands. I was deep into an article about making your own point motors from ex-GPO solenoids, cotton reels and a six inch nail all of which were readily available for a few coppers from your local government surplus store, (now a fast food shop) when it slowly dawned on me that time had marched on from when I was a lad and Biggles was still pc. So I rushed out and bought a copy of the latest railway modelling mag. What an eye opener! Sawdust and dry tea leaves were out, static grass was in, along with realistic engines, rolling stock, and buildings that looked like the real thing. It seemed that the third rail and moulded ballast system had gone too. (5 shillings pocket money was not going to go far!)
Right then, out to the garage and make a start. First things first, a cup of tea. That’s better, now to insulate and dryline the garage wall, then fix some battens at 40” height to support the base board. The baseboard size was to be 10ft X 2ft., which was made from 2” x 1” timber covered with some 5mm MDF that was left over from making a pelmet for the lounge!
Please note that throughout that it is no problem for me to switch from imperial to metric measurements as the mood takes me, and that a lot of things that I use are left over from various DIY jobs around the house, as my pocket money does not stretch very far these days. I will now know what to ask for at birthday and Christmas time!
The space that was available in the garage was 10ft x 7ft, so this was partitioned off, leaving the rest of the garage for the usual junk that you accumulate, if like me you never throw anything away. This was now about to prove a useful habit. The dry lined wall was painted with some left over emulsion, a coat of matt magnolia and a pale blue which was faded into It., Sounds rather horrible, but with some fluffy white clouds sponged on looks not too bad. (Should I do the same in the kitchen? better not said the wife).
Rummaging in the pile of junk now residing in the small part that was left of the garage, were some 5mm fibre boards used to insulate the laminate flooring that we fitted. “Ah ha” I exclaimed. “Just the job for covering the baseboard with! Further investigation in the pile of junk turned up a part used tub of flooring adhesive. This was used to fix the boards to the MDF and when dry a coat of neat PVA was used to seal it all.
Westerham Station Construction
I realised that all the buildings and other bits and bobs would have to be scratch built, but I thought that’s why it’s called railway modelling.
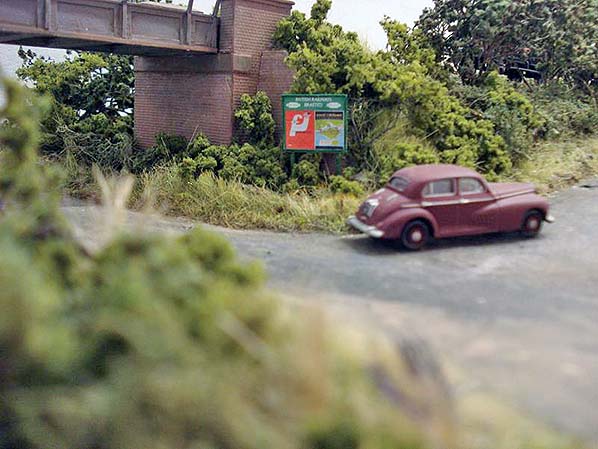
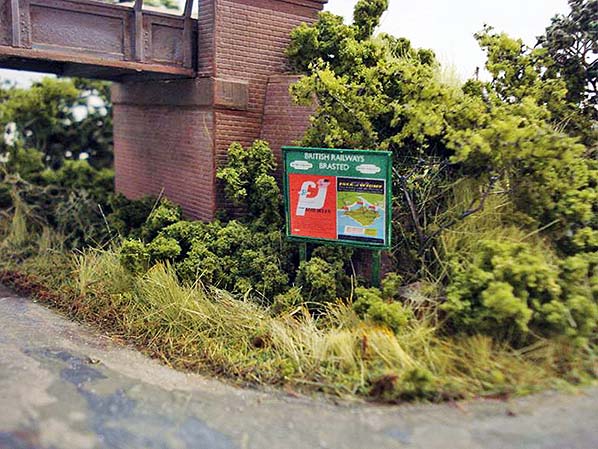
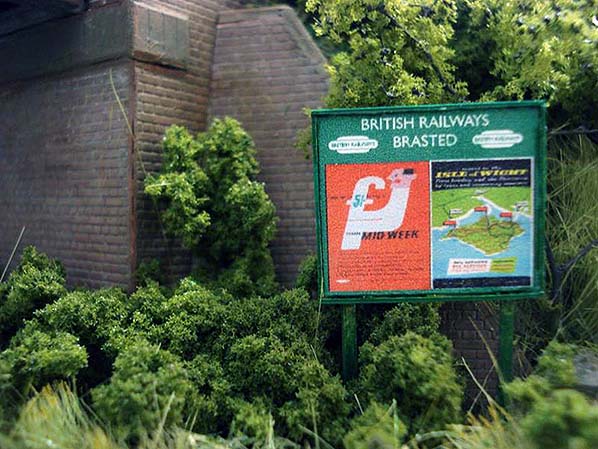
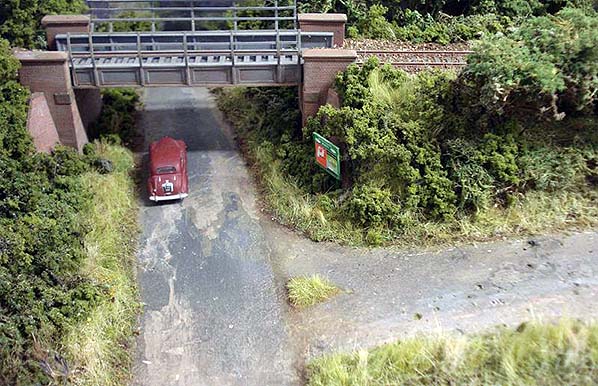
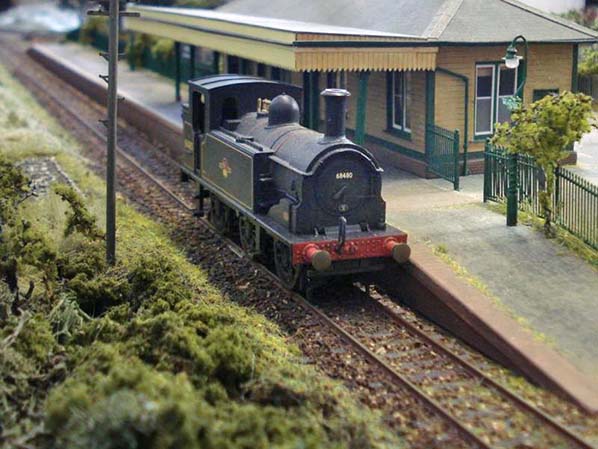
In my mind’s eye it was important that some key areas were modelled, i.e the road outside the station, the hotel, large billboard, allotment, water tank, and a representation of the school with its Kentish rag stone wall, also the belisha beacons, the holly bush on the station platform, and the road down to the goods shed. All insignificant items by themselves but added together made the whole. But some compromises would need to be made with the track plan and location of some items to fit the space available. The track plan that I chose to model is the pre-1930 version which still had the connection from the loading dock to the run around loop.
It was never my intention to try to replicate an exact copy of the site of Westerham station for several reasons, one being that it would be something that I would never be able to achieve in a month of Sunday’s, and another was that this was supposed to be fun. Not a chore.
A left over roll of wallpaper was used to draw the track plan and road on, and when I was fairly happy that most of the key elements could be accommodated, it was transferred to the baseboard, the track was set at angle running into the right hand corner which gave a slighter longer length of track and a greater illusion of distance, by doing this it let me accommodate the road, hotel and school. At this stage I realised that some different ground levels would have to be built into the baseboard, as the platform was level with the road outside the station, which when it reached the road down to the goods yard dropped to track level!
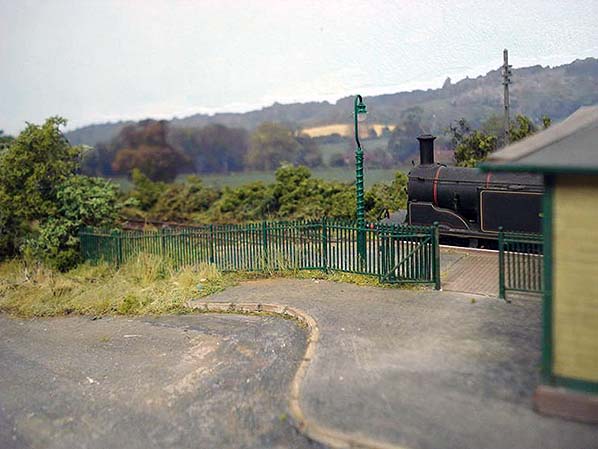
When I had finished scratching my head, and most of my stuffing had fallen out, a solution to my problem was found. Back in the junk hole was some left over plasterboard from the dry lining which would make the roadway and platform. It was cut to the shape needed for the road, and a separate piece used for the platform which was suitably ramped at either end. This was all stuck down using the flooring adhesive, the paper layer was stripped off the plasterboard and the course of the road marked out with pencil onto the plaster surface. This was shaped with a scraper to form the camber of the road and then sloped down to the goods yard. The platform surface was created by using some left over (here we go again) cushion floor from doing the bathroom floor, and fixed to the plaster platform with the flooring adhesive. this was set back from the platform edge to allow for the platform edging bricks, which were made from plasticard match boarding, cut across the width of the sheet and mounted onto a strip of card to bring it up to the platform surface height. The face of the platform is a mixture of Wills and Slaters plasticard, the surface of the platform was sanded to give a worn look (a bit like myself). The allotment vegetables are plasticine and strands of static grass fibers with touches of paint highlights.
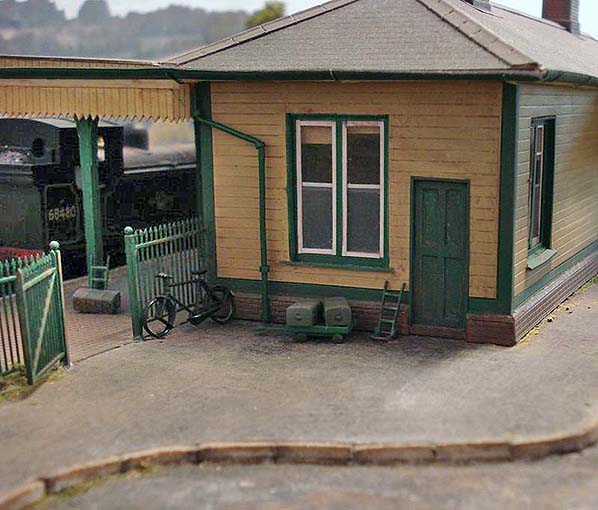
Creating the buildings
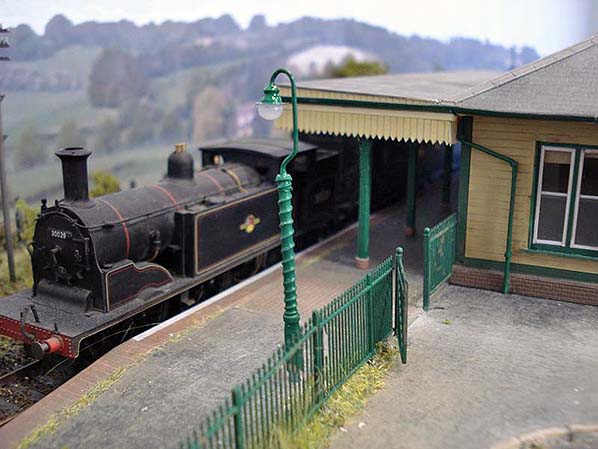
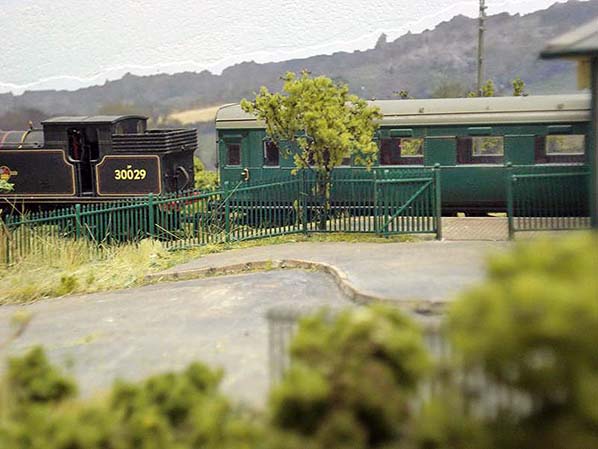
Station buildings are made from drawings of the originals which are in David Goulds excellent book, Westerham Valley Railway. Published by Oakwood Press. My methods of construction have been used by countless modellers and are well known. Suffice it to say that they are made from good quality card about 1.5mm thick and covered with the appropriate plasticard. The water tank is made from the Dapol kit which was twice the size needed and had only 4 legs. Two more legs were made and the tank reduced in size. Another building to come under the scalpel (by now I was beginning to feel like a mad surgeon) was the Crown Hotel, which started life as the Superquick Hotel. This was reduced to a low relief structure with the roof and chimneys altered and a side addition added.
I had decided from the outset to only model detail that I was able to see with my glasses on and at a reasonable viewing distance!
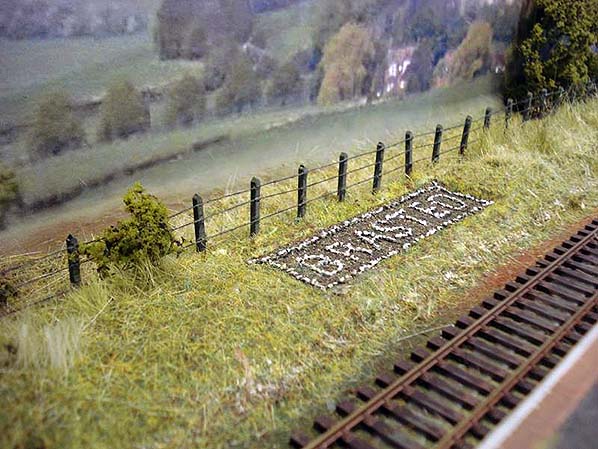
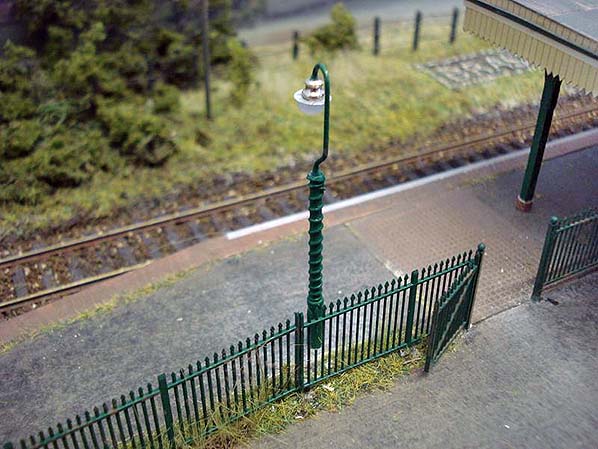
Fencing, railings, street lights and lamp hut are all brought items (why try to reinvent the wheel) the fencing has been strung using cotton. The loading gauge is Ratio but as is typical, nothing like the one at Westerham, so that came under the knife. Likewise the ringed starting signal for the goods yard. Bits of a Biro tube, a handle from the water tank and some rolled up paper, made the water crane. Platform lights are plastic rod and paper clips suitably bent, a yard light was made from plastic tube and wire, the Belisha beacons are berry pins with the plastic covering from paper clips used to make the black and white rings. Other buildings have been scaled from old photographs.
Painting
Everything has been painted using matt colours, white and black have not been used at all only as basis for changing tones of colours. Where you see white or black used on the layout, it is in fact very light, or very dark grey. Road vehicles have all been sprayed using Railmatch matt varnish and the tyres have been “dirtied” using a clay wash grime dye. The same dye has been used on all the rolling stock.
This is something I was very apprehensive of doing, but once started I found it to be great fun and very easy to use. My method was to brush it all over the piece of rolling stock, and then wipe it off with a damp brush and a cotton bud until the desired effect was achieved. Pastel chalks have also been used to add extra colour and highlights where needed.
Scenery and Backscene
The backscene is a bought one, but has had the sky cut off and about 4” cut from the base it was a bit short by 2ft but that has been hidden at each end by trees.
The scene on the left hand side of the layout was made by using a screen shot of Westerham in Google earth, and modifying it in Photoshop.
The trees on the layout are a mix of Woodlands Scenics fine green foliage, and some that I made using bits of a bush that was growing in the garden. These were soaked in a mix of glycerine and water, left to dry, then spray glued and dipped in some scatter. Grass has been put down using a homemade static grass gun made from a battery powered bug zapper and a cut down metal tea strainer details which I found on You Tube (cost about £3). I did tell you it was all built with saving money in mind!
The Period Modelled and Rolling Stock
The period that I am modelling is 1955 to closure. Some of the motive power used during the railways life were: The Sentinel Railbus, Peebles steam railcar, Steam motor car No 3, Q class, O1 class, R1 class, B1 class, H class, and an unbelievable eleven coach special excursion pulled by No 34017 Ilfracombe Bullied Light Pacific.
Track & Point operation
All of the track is Peco code 75 & live frog points. The points are operated by Wire and Tube using switches mounted on a panel at the front of the baseboard.
Control
Analogue using a Gaugemaster 100m controller
The Future
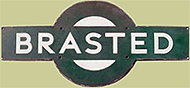
Originally, I had planned to have a small fiddle yard the other side of the partion, but have abandoned this idea and instead will continue the line round to the opposite side of the garage in a U shape and build Brasted Station. Now that sounds like a plan.
This has been such a pleasure to research and build that I wish that I had done it years go.
A selection of photographs of the completed model are reporoduced here. A much more detailed account of the construction with many more photographs can be found on the RMWeb site.
Adrian has also produced 8 films which can be viewed on You Tube
FILMS:
See also models of Westerham & Chevening Halt |

 Home Page