
THE 1886 LIVERPOOL EXCHANGE
|
A view looking north along the 1886 Liverpool Exchange approach lines from Liverpool Exchange Number 1 signal box in 1976. The bridge just to the front of the ex-LMS class 502 EMU that has the curved sections of supporting ironwork carried the lines over the ex-LNWR Waterloo branch.
Photo by John Blinkhorn
Photo by John Blinkhorn
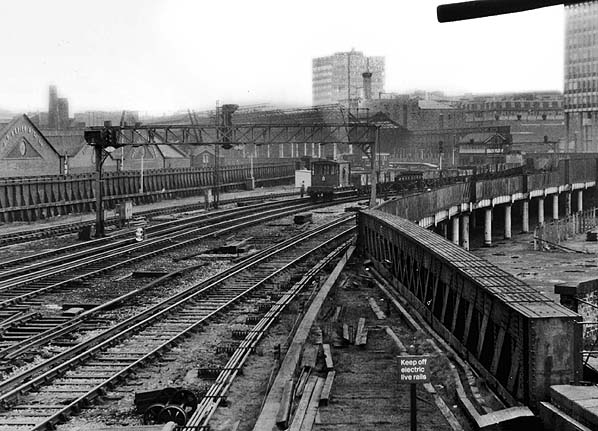
Looking south towards Liverpool Exchange station from Liverpool Exchange No.1 signal box in 1976. The substantial ironwork of the 1886 line is clearly illustrated. The cleared ground to the right was the site of the Great Howard Street goods station lower yard.
Photo by John Blinkhorn
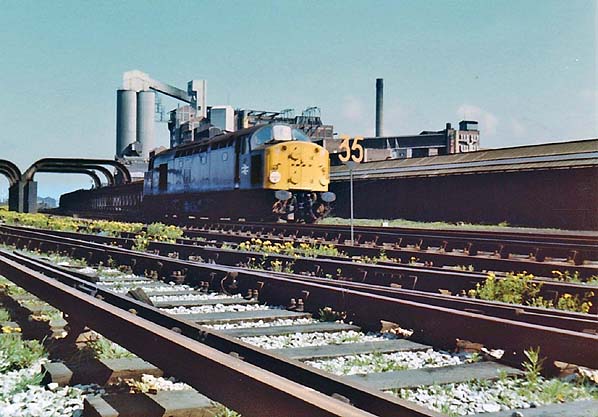
A Class 40 locomotive is seen on the 1886 approach line on a summer Saturday in 1976. It was bound for Liverpool Exchange station to collect a failed DMU.
Photo by Tony Graham
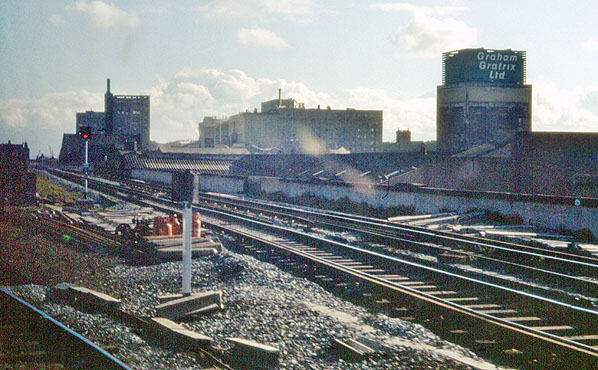
In this view looking south from 1976 the 1850 and the 1886 lines to Liverpool Exchange can be seen. The 1850 line which was formed of brick arches is to the right. The 1886 line at this point was supported on iron columns and it is seen to the left. There was a junction between the two lines from 1850 until 1941. Liverpool Exchange No.1 signal box, seen in the view, dated from 1962 and was built on the trackbed of the 1850 line.
Photo by John Blinkhorn
 Looking south along the 1886 Liverpool Exchange approach lines in 1976. Liverpool Exchange can be seen in the distance. Also in view is an engineers’ train hauled by a Class 25 locomotive.
 Photo by Tony Graham
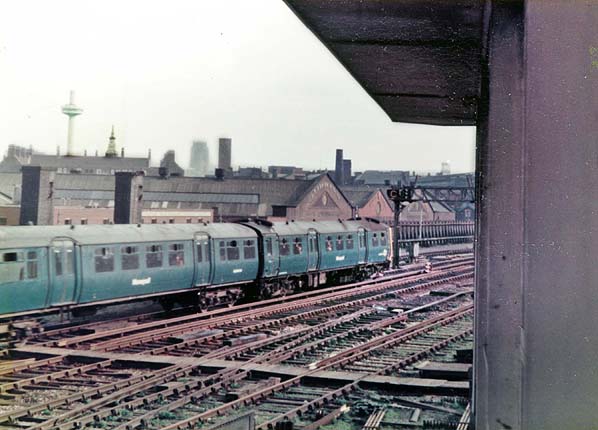
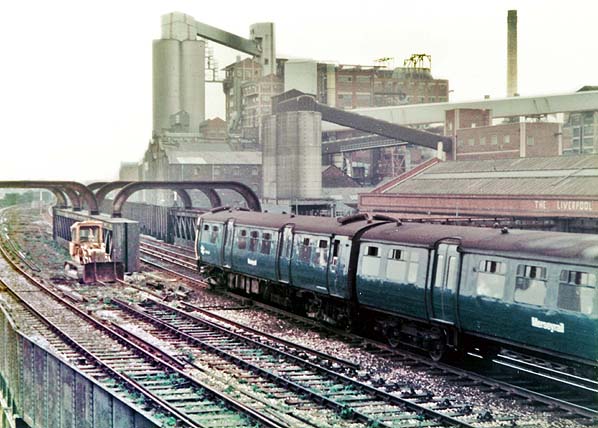
Looking south from Liverpool Exchange No.1 signal box in 1976. Heading into Liverpool Exchange is an ex-LMS class 502 EMU.
Photo by John Blinkhorn
Photo by John Blinkhorn
The 1886 Liverpool Exchange approach line looking north from ground level in 1976. The iron arch seen bottom right was part of a bridge that spanned the ex-LNWR Waterloo branch. It was designed by John Hawkshaw and was completed in 1849. Lines were later laid over the bridge including those that linked to Chadwick Street. The 1886 line was carried over the Waterloo branch bridge by a lattice girder bridge which can be seen top left. Behind the wall to the right is Pall Mall.
Photo by John Blinkhorn
Photo by John Blinkhorn
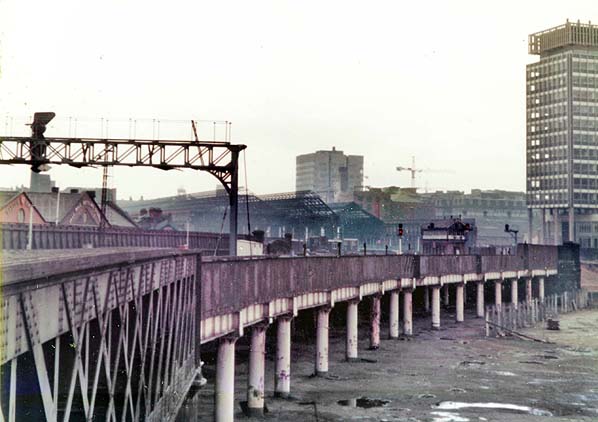
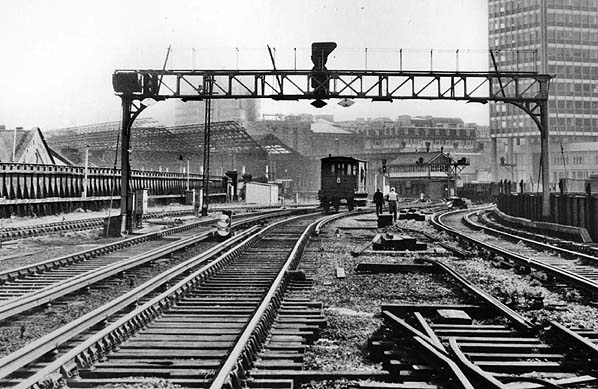 Looking south to Liverpool Exchange in 1976 during engineering works.
 Photo by John Blinkhorn
The site of Liverpool Exchange Junction looking south on 29 April 1977. The lines to the right were part of the Merseyrail link line. They were not connected to the 1886 lines, seen to left, on this date but after the last train had run from Liverpool Exchange later that day work began on connecting them to the ex-LYR main line. During that process the 1886 lines were severed from the network.
Photo by John Blinkhorn
.jpg)
Looking south on 30 March 2015 along the 1886 approach line. This point would have been adjacent to Liverpool Exchange Junction.
Photo by Paul Wright
Click here to return to main page
 Home Page
| Last updated: Sunday, 21-May-2017 14:32:40 CEST |
© 2004-2015 Disused Stations
|