
[Source: Nick Catford]
Folkestone Harbour Station Gallery 5:
Click here for Folkestone Harbour Station Gallery 6:
|

harbour_old17.jpg) The last inspection train along the Folkestone branch ran on 24 February 2012. It had been planned to run into the station but was forced to stop just short on the viaduct because of the poor
The last inspection train along the Folkestone branch ran on 24 February 2012. It had been planned to run into the station but was forced to stop just short on the viaduct because of the poorharbour_old18.jpg) The inspection train is seen on the viaduct at Folkestone Harbour on 24 February 2012 before making the return journey to Folkestone Junction.
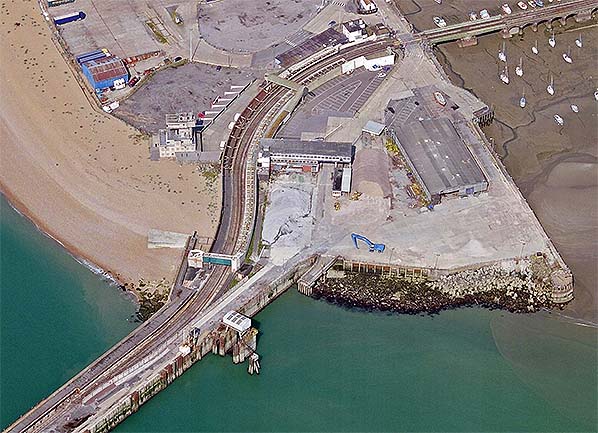
The inspection train is seen on the viaduct at Folkestone Harbour on 24 February 2012 before making the return journey to Folkestone Junction.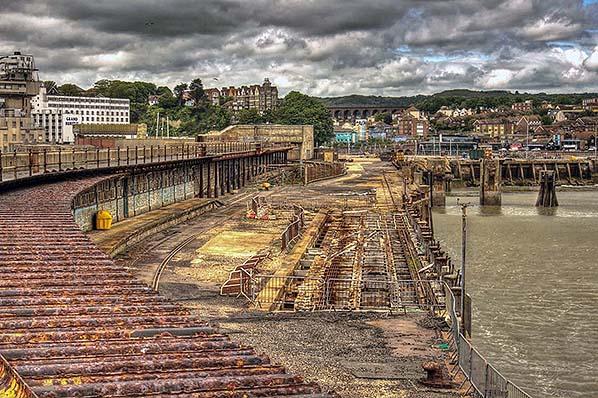 The derelict pier at Folkestone Harbour looking north in 2014. The Foord viaduct can be seen in the distance. The white building on the left is the Grand Burstin Hotel which was built in 1984 on the foundations of the Royal Pavilion Hotel. Click
 harbour46.jpg)
harbour10.jpg)
harbour22.jpg)
harbour27.jpg) Folkestone Harbour station looking south towards the pier from the down platform in September 2014.
Folkestone Harbour station looking south towards the pier from the down platform in September 2014.harbour31.jpg) Folkestone Harbour station looking north from the pier promenade in May 2014. The derelict coastguard station is seen in the distance; it was demolished later that year.
Folkestone Harbour station looking north from the pier promenade in May 2014. The derelict coastguard station is seen in the distance; it was demolished later that year.harbour35.jpg)
 Home Page